Overview
Let’s face it … security is HARD. Implementing authentication and authorization into applications has always been a challenge and a chore for developers. Building a secure application requires strong knowledge across a number of areas.
Thanks to the power of Easy Auth on Microsoft Azure it’s easier than ever to setup secure authentication for your web application with the click of a few buttons… Yep, I’m not kidding!
Ok let’s get started …

Introducing Easy Auth …
The area of security, specifically authentication and authorisation has always been a challenge for developers because building secure applications ain’t easy.
If you’re already using the Azure cloud to host your web apps then you are in luck because Microsoft has come to the rescue and has made it easier than ever to create an authentication wrapper around your Azure App Service at the click of a few buttons using a technology commonly known as “Easy Auth”.
Sounds good, right? You bet!
How does it Work?
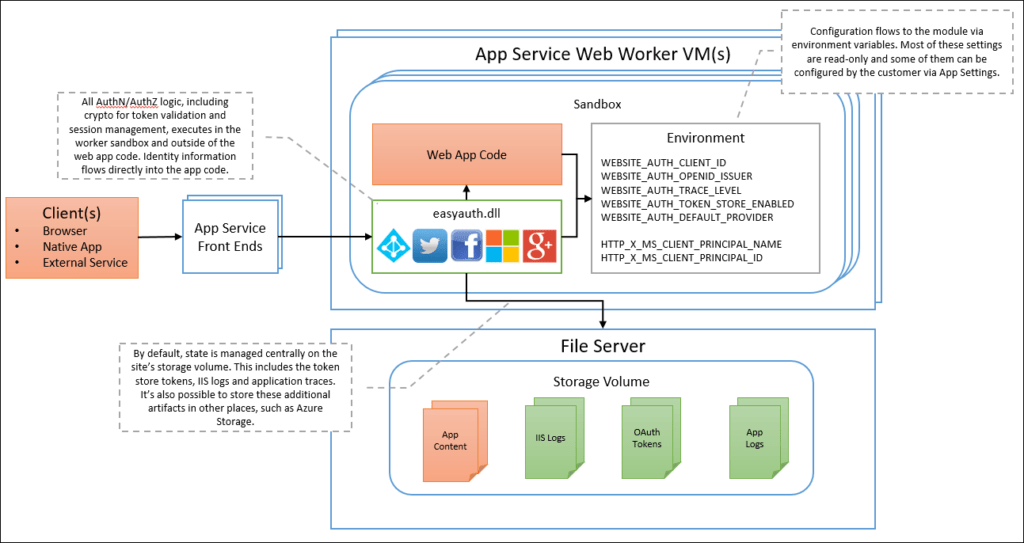
When you enable “Easy Auth” in Azure, behind the scenes Azure sets a number of environment variables within your app services sandbox environment which enables the Easy Auth module.
Azure allows you to authenticate with various third-party identity providers including Azure AD, Microsoft accounts, Facebook, Google and Twitter.
All you need to do is configure the authentication settings and Azure will take care of the rest for you. This decouples the authentication function from your application, therefore minimising time and effort, and helps ensure your application is more portable by reducing third-party dependencies.
How do I Enable Authentication for my App?
Now we’ll walk through the process of enabling authentication for an existing Azure App Service. In this example, I’ll specifically be focusing on authenticating with Azure AD, as it is the most common use case. I’ll demonstrate the bare minimum steps to get it up and running as quickly as possible.
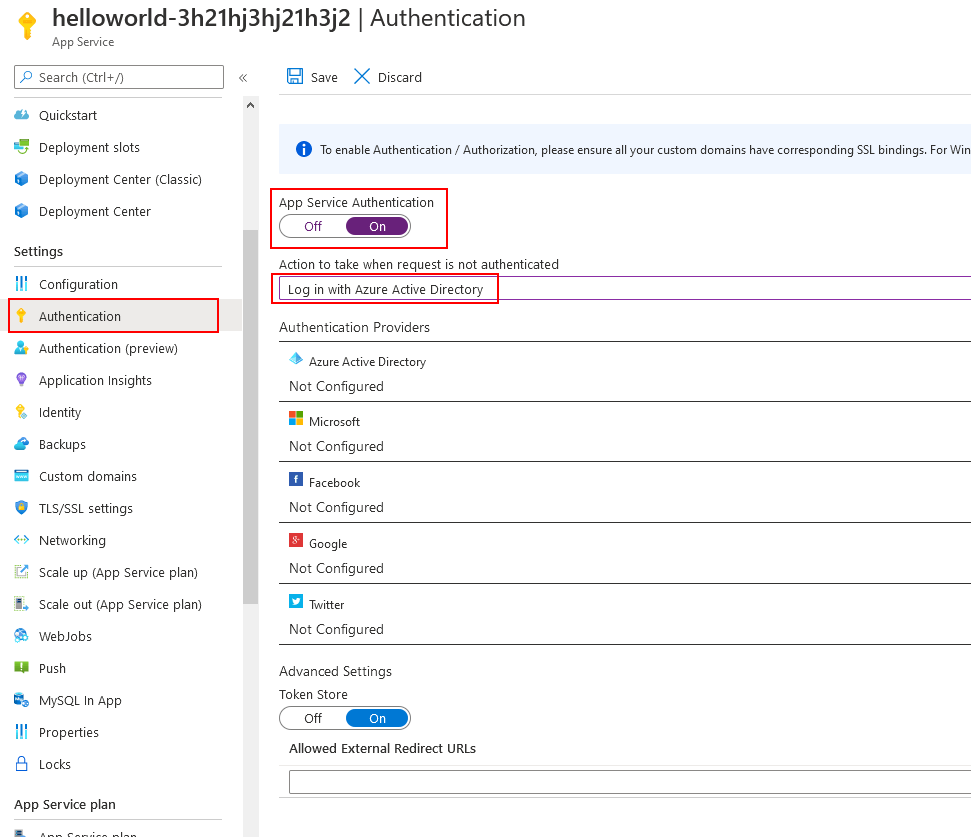
1. Navigate to your App Service within Azure and select the SETTINGS > AUTHENTICATION blade.
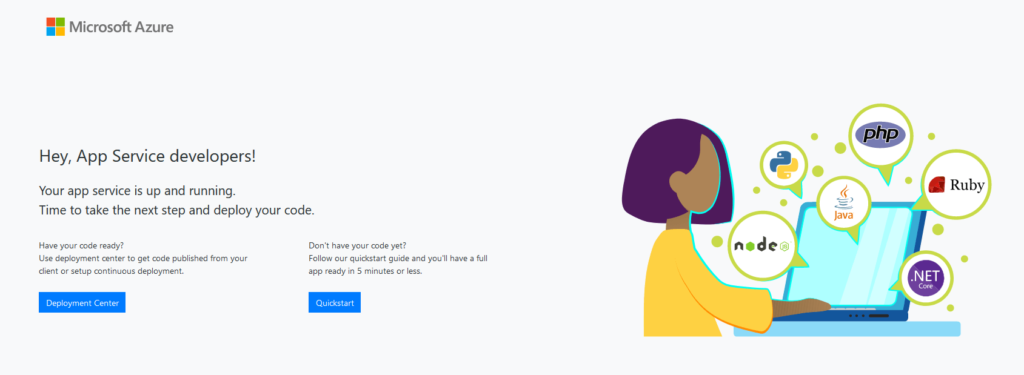
To demonstrate how it works I’ve created a brand new Azure App Service resource. This will spin up a shell website containing the below landing page. Let’s imagine this is my web application that I want to add authentication to.
2. Set ‘App Service Authentication’ to ‘On’ and select ‘Log in with Azure Active Directory’ as the identity provider to enforce Azure AD authentication for anonymous users.
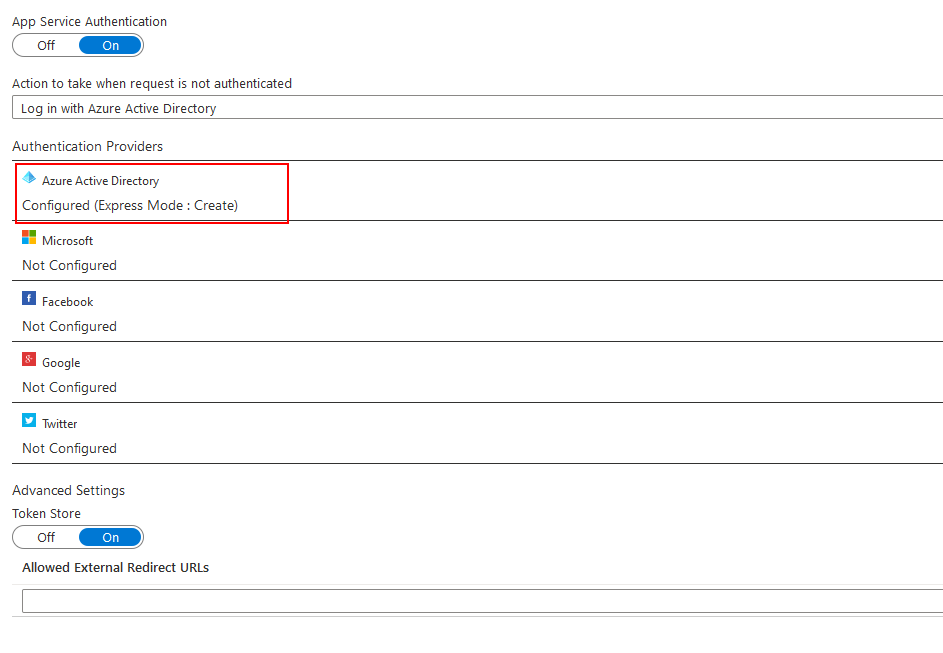
3. Next, click the ‘Azure Active Directory’ section below to access the configuration screen.
4. Set the ‘Management Mode’ to ‘Express’.
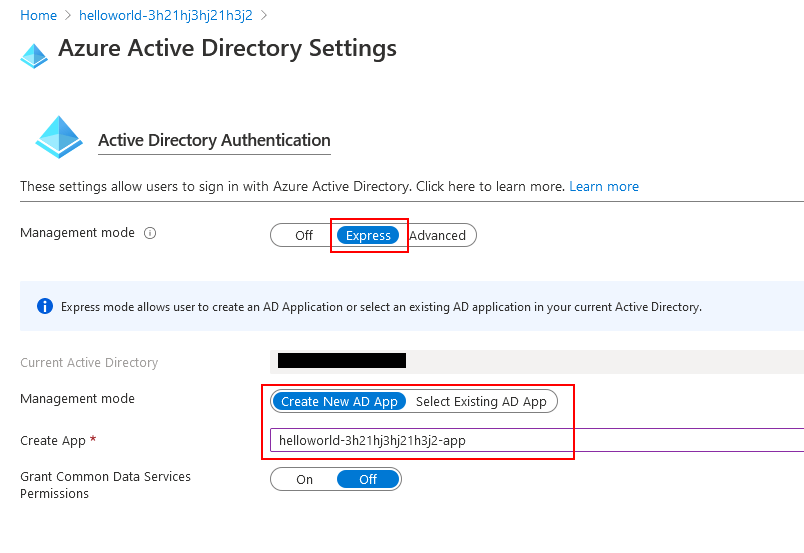
5. We’ll need to associate this App Service with an Azure AD Application Registration. You can either select an existing Azure AD App Registration, or you can create a brand new one. In this case, I’m creating a brand new app.
6. That’s it! It’s now time to test our web application…
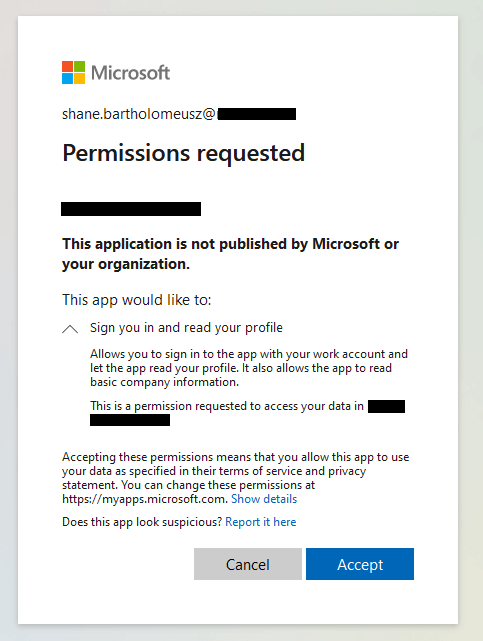
Now when I access my web application I am now prompted to authenticate with Azure AD before I can access the website.
Note: In the above example, my Azure AD account already has access to the new Azure App Registration I created. You’ll need to make sure your account has access to the Azure App Registration, otherwise, you will be denied access to the web application.

How to Access the Claim Information?
User claims can be accessed through specific request headers that are passed across to your app by the Azure App Service.
- X-MS-CLIENT-PRINCIPAL-NAME
- X-MS-CLIENT-PRINCIPAL-ID
- X-MS-TOKEN-AAD-EXPIRES-ON
- X-MS-TOKEN-AAD-REFRESH-TOKEN
More information can be found here about these headers:
https://docs.microsoft.com/en-us/azure/app-service/app-service-authentication-how-to#access-user-claims
To demonstrate, I’ve created a simple dotnet core web app to display these headers back to the end user. Source code can be found here – https://github.com/sbartholomeusz/aad-auth-demo.
- First, I’ll create a shell web application using the command line.
> cd C:\Temp\
> dotnet new webapp --name "az-auth-demo"

The template "ASP.NET Core Web App" was created successfully.
This template contains technologies from parties other than Microsoft, see https://aka.ms/aspnetcore/3.1-third-party-notices for details.

Processing post-creation actions...
Running 'dotnet restore' on az-auth-demo\az-auth-demo.csproj...
  Determining projects to restore...
  Restored C:\Temp\az-auth-demo\az-auth-demo.csproj (in 202 ms).

Restore succeeded.
2. Next I need to replace /Pages/Index.cshtml with the below code which displays the headers contained in the web request:
@page
@model IndexModel
@{
	ViewData["Title"] = "Home page";
}

<div class="text-center">
	<h1 class="display-4">Request Header Inspector</h1>
	<div>
    	<p>
        	<b>X-MS-CLIENT-PRINCIPAL-NAME:</b><br />
        	@Request.Headers["X-MS-CLIENT-PRINCIPAL-NAME"]
    	</p>
    	<p>
        	<b>X-MS-CLIENT-PRINCIPAL-ID:</b><br />
        	@Request.Headers["X-MS-CLIENT-PRINCIPAL-ID"]
    	</p>
    	<p>
        	<b>X-MS-TOKEN-AAD-REFRESH-TOKEN:</b><br />
        	@Request.Headers["X-MS-TOKEN-AAD-ID-TOKEN"]
    	</p>
    	<p>
        	<b>X-MS-TOKEN-AAD-ACCESS-TOKEN:</b><br />
        	@Request.Headers["X-MS-TOKEN-AAD-ACCESS-TOKEN"]
    	</p>

    	<p>
        	<b>X-MS-TOKEN-AAD-EXPIRES-ON:</b><br />
        	@Request.Headers["X-MS-TOKEN-AAD-EXPIRES-ON"]
    	</p>

    	<p>
        	<b>X-MS-TOKEN-AAD-REFRESH-TOKEN:</b><br />
        	@Request.Headers["X-MS-TOKEN-AAD-REFRESH-TOKEN"]
    	</p>
	</div>
</div>

3. Publish the app to Azure. Make sure you enable authentication with Azure AD for the App Service.
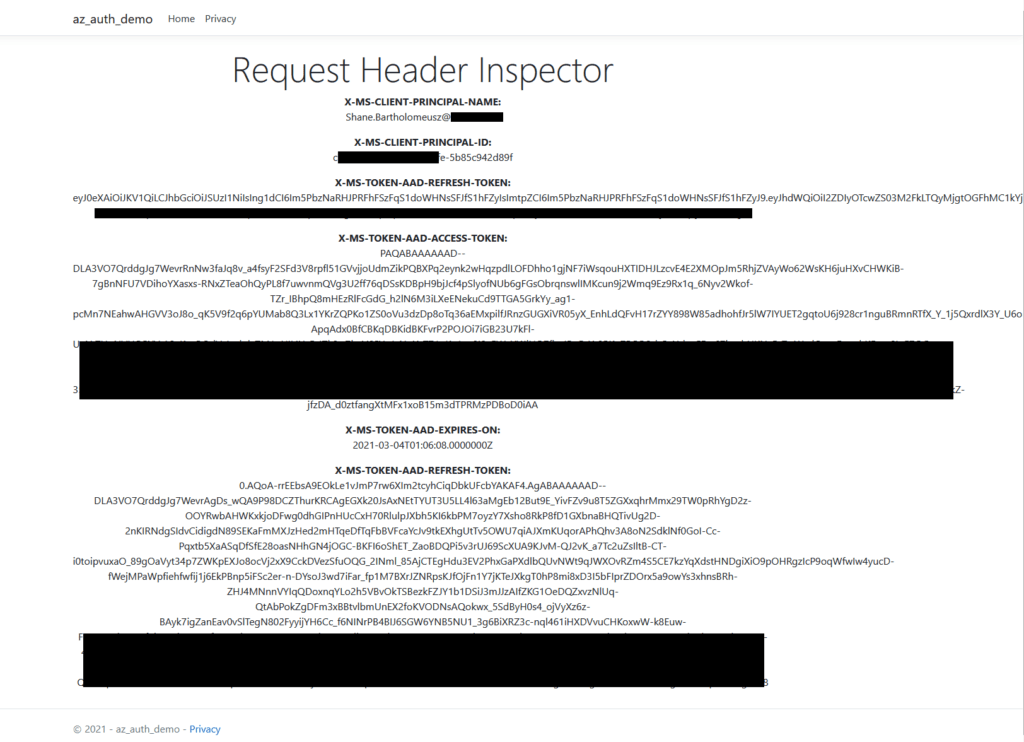
Now when I launch the web app, I now see the user’s claim information displayed directly on the web page.
Obviously, you shouldn’t display the claims information to end-users, but you can see how easy it is to access this information.
Want to Know More?
- You can find more information about Azure Easy Auth here:
https://docs.microsoft.com/en-us/azure/app-service/overview-authentication-authorization
- You can also find information about other advanced configuration options here:
https://docs.microsoft.com/en-us/azure/app-service/app-service-authentication-how-to#access-user-claims
- Source code for the above sample web application can be found here:
https://github.com/sbartholomeusz/aad-auth-demo
Final Thoughts
I hope this article demonstrates how easy it is to enable authentication for your Azure web application using Azure Easy Auth.
Azure Easy Auth is ideal for simple scenarios where you just need some basic authentication for your existing Azure web application. However, if you have more advanced needs then you may need to look at alternative solutions.
- Solved: Filename too long for Git - 18th April 2025
- GitHub Actions Exam Study Guide - 14th February 2025
- Solved: Build Errors Not Showing in VS 2022 - 21st November 2024